
Viewing orders #
When you start taking orders, the Orders management page begins to fill up. View these at: WooCommerce > Orders.
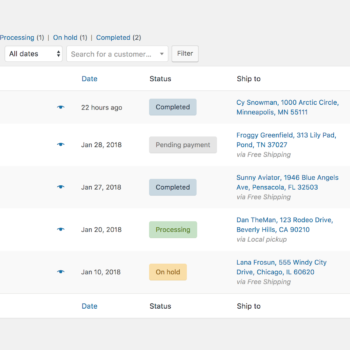
Each row displays useful details, such as order number and customer name, date of purchase, order status, shipping address, and purchase total.
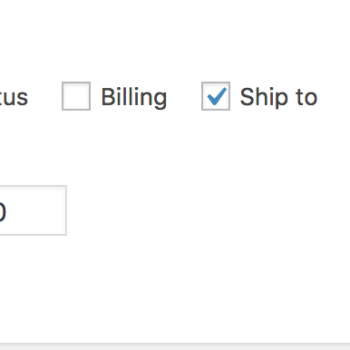
Should you need more or less information on the Orders page, you can open Screen Options at the top right corner. A panel opens.
Select which Columns and how many Items you want displayed on each page, then Apply.
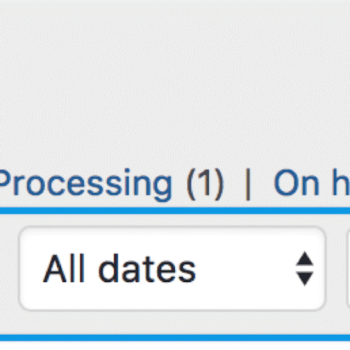
Filter orders by Date (month/year) or Search for a (registered) Customer.
Arrange orders in ascending or descending order by Order number, Date or Total by clicking the heading.
![]()
Click the order number and customer name to see the Single Order page, where you can also Edit order details, Update Status, and Add Notes.
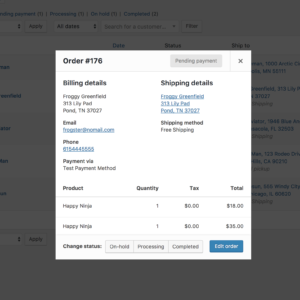
Order rows have a Preview ‘eye’.

Clicking Preview opens a Modal, containing order number, order status, billing/shipping details, items ordered, payment method, and the option to change/edit order status.
Order Statuses are color-coded and descriptive.
- Canceled – Grey
- Completed – Blue
- Failed – Red
- On Hold – Orange
- Pending Payment – Grey
- Processing – Green
- Refunded – Grey
Hovering over an order Status displays Notes made on the order.

At the end of a row are shortcut buttons to quickly mark orders as Processing or Complete.
![]()
Editing/viewing single orders #

From the Single Order page not only can you view all order data, but also edit and update.
- Change the order status
- Edit order items – modify the product, prices, and taxes
- Stock – Reduce and restore stock for an order
- Order Actions – Email order details to customer (handy if manually creating an order for your customers) or Regenerate download permissions
- Modify product Meta to edit product variations by removing and adding meta
- Apply coupons. You will need to know the coupon code to apply to the order. Coupon usage counts are tracked, and coupons can also be removed from orders. Note: the order must be unpaid for coupons to have an affect
- Add fee. You can enter an amount or percentage to add a fee to an order. Negative fees will apportion taxes between all other items, and will not make the cart total go below zero
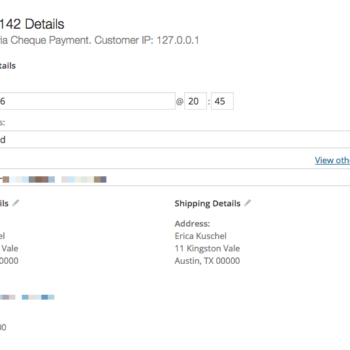
Order Data #
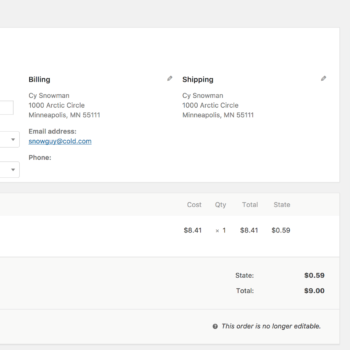
The Order Data panel lets you modify the order status, view (or change) the customer’s order note, and change which user the order is assigned to.
You can also find customer billing and shipping addresses, along with a link to view other purchases the customer may have had in the past. To edit addresses, click Edit and a form appears. Once saved, the new address is displayed in a localized format.
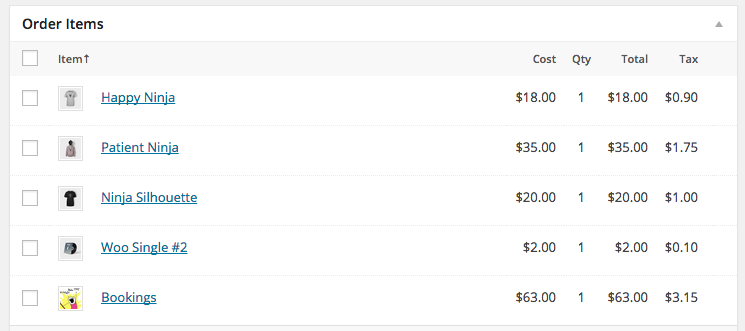
Order Items #
Note: To edit the order, the status must be set to On Hold or Pending Payment.
The next panel on the order page is the Order Items panel. It lists items in the order, quantities, and prices.
The editable parts of line items include:
- Tax Class – Tax class for the line. This may be adjusted if, for example, the customer is tax exempt.
- Quantity – Number of items the user is purchasing
- Line Subtotal – Line price and line tax before pre-tax discounts
- Line Total – Line price and line tax after pre-tax discounts
- Add Meta – Add and remove meta to change product variable options.
- Sorting – Sort by Item, Cost, Quantity, and Total by clicking on the respective listed items.
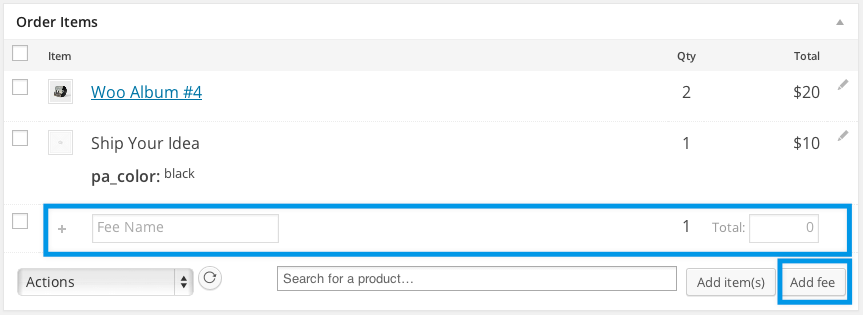
It’s also possible to add additional fees for items. Select Add Fee and enter fee name, tax status and amount:
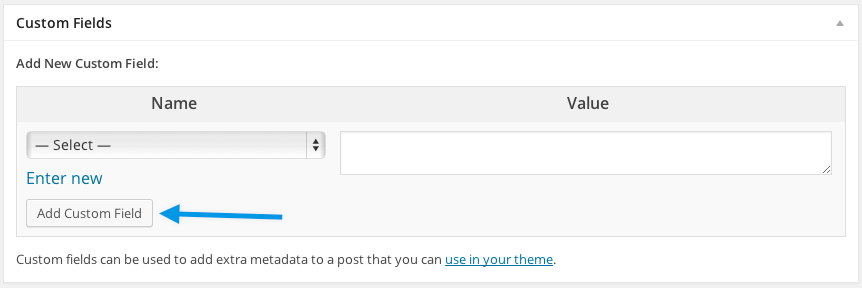
To add custom meta fields, use the Custom Fields metabox:
Order Totals #
Order Totals stores totals and tax for the order. Enter these values yourself or have them partially calculated for you using the ‘calc totals‘ button. Totals comprise:
- Cart Discount – pre-tax discounts. Can be auto-calculated.
- Order Discount – post-tax discounts. Need to be input manually.
- Shipping cost – cost excluding tax
- Shipping method – name of the method
- Cart tax
- Shipping tax
- Order total
- Payment method – name of the payment method used
There are two buttons available on this panel – calc taxes and calc totals. Calculating taxes will use your prices, and calculate tax based on the customer’s shipping address. If the customer’s address has not been input, it defaults to the store’s base location.
There is also a section called tax rows, which is where to define and name multiple tax rows. This is useful if, for example, you charge multiple taxes or use compound taxes. Values are displayed on the customer invoice.


