
Employees in the Amelia Booking plugin are those who perform a service. It is necessary to have at least one employee created for the plugin to work properly. This option is specifically for companies with several employees to make it easier for them to manage and track their appointments, their availability, and the services they provide. If you have just one employee and you don’t want it shown on the front pages, don’t worry. When you create only one employee it will be automatically hidden on the front pages.
Managing a single Employee #
Let’s begin creating the first employee. Go to the “Employees” page, click on the “Add Employee” button or the “+” button on the bottom right side of the page and the “New Employee” dialog will appear. We will now go through the options:
- Details – is the first tab for creating the employee.

It consists of:
-
- Employee photo – for every employee you are able to set the photo that will be visible on both sides of the plugin – on the back-end so you or your manager can differentiate them easily, and on your website so your customers or clients can see them.

-
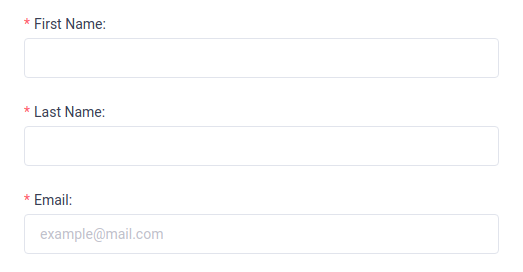
- First Name, Last Name, and Email are mandatory fields for every employee. Note that you cannot have two employees with the same email – if you enter the same email a second time, and try to save the employee, you will see a red alert under the email option that informs you about an already existing email.
-
- Location – This option isn’t always visible:
- If you don’t create a location the location option will not appear in any settings, and it will not be visible in this modal as well. Let’s say your company is doing business in one location only, and you don’t want to show that location because it is the only one. You can create it and then hide it, but that doesn’t serve any purpose. So, you can simply skip creating the location.
- If you create just one location every employee you create will get this location.
- If your employees provide services at multiple locations, the Location option in the Employee modal becomes mandatory and you will have to choose a location for each employee.
- Location – This option isn’t always visible:

-
- WordPress User – This allows you to give your employee an account that allows entrance to the back-end of the plugin. By adding this role, you give your employees an option to see their appointments on the Appointments page and Calendar and export the list of their appointments so they can track it any time. You can select an existing user (that you created on the Users page) or Create New by clicking on the button in this dropdown. If you click to create a new WordPress user, once you save the employee, a new Amelia employee user with the email you entered above will be created. Then you can go to the Users page to change the password and other settings regarding this user. With this option you are giving your employees

-
- Google Calendar – where your employees can connect their Google Calendars, so once the appointment is scheduled it will be automatically added to their calendar. All they need to do is to click on the button beside the Google Calendar option and they will be redirected to choose their Google Account. Once they choose it, they will be back on their profile in the Amelia Plugin with the selected Google Calendar email.

-
-
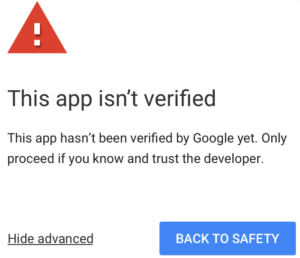
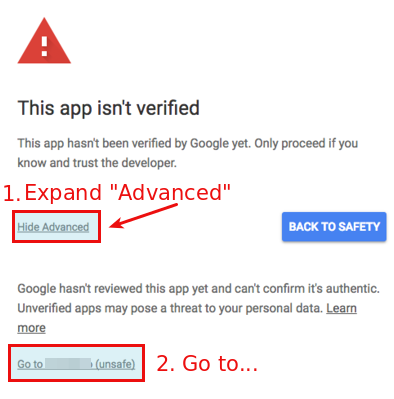
- Please note that, after choosing the Google account your employee will be synced with, you may be presented with “This app isn’t verified” screen.
-
-
-
- This is happening because the verification is not yet complete, and you simply need to click on “Advanced” and then on “Go to your-website (unsafe)“, and you will be redirected to the next screen where you need to allow Amelia to access the calendar.
-
-
-
- Once the Calendar is connected the Google button will change in color and offer an option to “Sign out from Google“, so you’ll know if the synchronization is working.
-

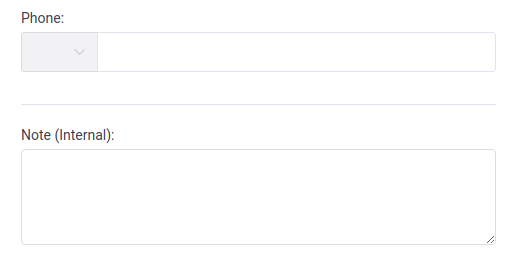
- Phone and Note are additional settings that are not mandatory, but you can enable if you want additional information. These options will not be visible on the front-end of your website
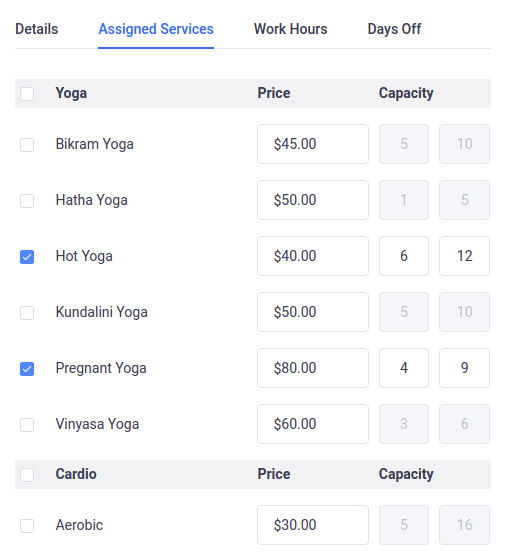
- Assigned Services – This is where you can check the services provided by at current employee. Each employee can have more than one assigned service and there is no limit on the number of services that can be assigned, i.e. all services can be checked. Once you check a service, the price and capacity inputs become available, allowing you to set a custom price and capacity for the employee.
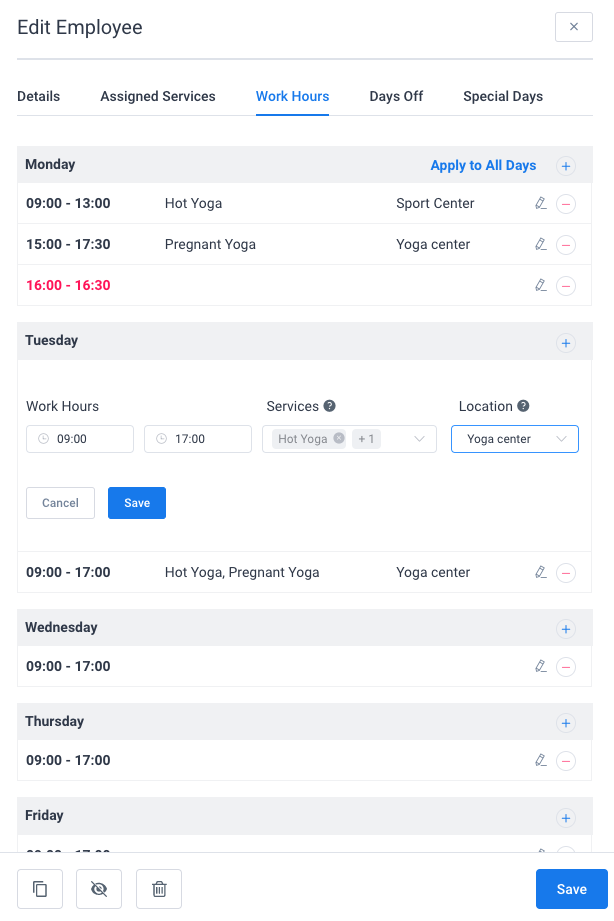
- Work Hours – This is where you set custom working hours and breaks for any employee if that employee has different working hours and breaks from those you’ve set in the company global settings. You can choose different working hours and breaks for any day, but if you want to set the same schedule for the entire week, simply set it for Monday and click on the “Apply to All Days” button and the Monday schedule will be copied to the other days.
Click on the + button and new options will open, choose time in “Work Hours” option, choose services that employee will offer in that period of time and then choose a location. From version 2.1 we’ve added option for employees to work on multiple locations so now it is possible to set different locations for different periods in a day or days in a week. In the employees details you can still set one default location, so if your employee works on only one location just set it in the “Details” tab and you don’t have to set it in the work hours for each period since the default location will be automatically added to all periods. However, if you have multiple locations for one employee you will be able to choose one location for each time period that you create.
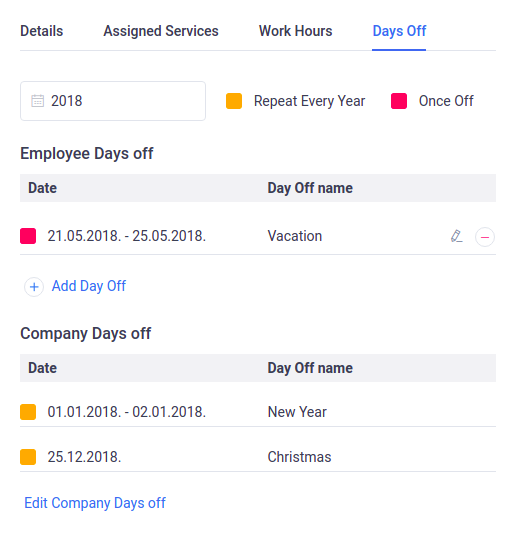
- Days Off – As is the case with working hours and breaks you can set custom days off for every employee. Click on the Add Day Off button and you’ll see several new options. Enter a day off name, a date or range of dates and check if you want this day off to repeat yearly. After you click Add Day Off, your Day Off will be saved, and depending on whether it is a repeating one or a one-time day off it will be colored in orange or red on the list.
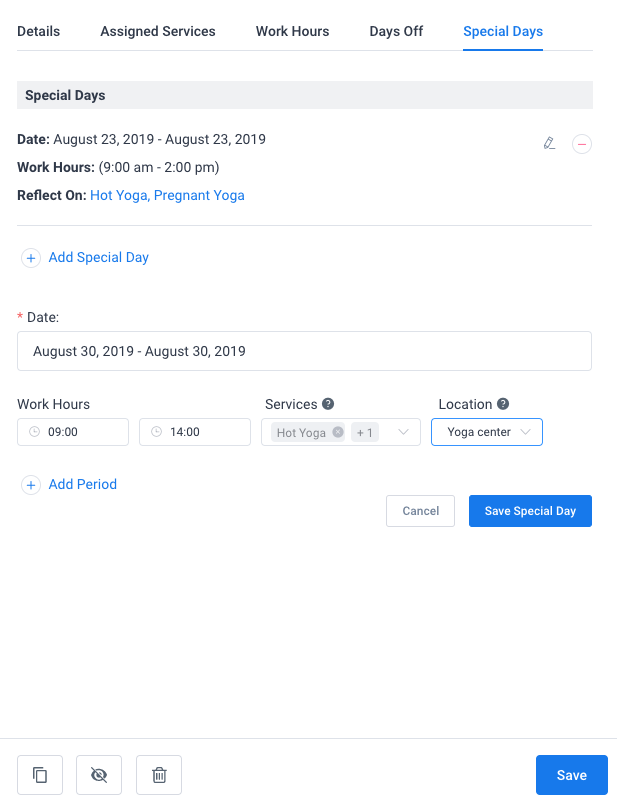
- Special Days – This feature allows you to set one or multiple days in which your employee will have different working hours and/or provide different services. Whether you need to set shorter or longer working hours for just one day or a period, or set a different service for one specific day or a whole week, here you can do all of this. Once you set it, it will override employee’s general working hours and service schedule but it will not override the days off. Click on the “Add Special Day” button and new options will appear. In Date option choose a date or a range of dates, then set one or multiple periods of time with working hours and choose one or multiple services for each of them in the Service option, and select specific location in Location option. After you configure the special schedule, click on the “Save Special Day” button and this schedule will be applied.
If you have services that are only provided from time to time (not on a daily or a weekly basis), this feature is for made you. You can simply delete the working hours and just use the special days, and the calendar on the front-end will show the first available appointment slot. This is useful especially for services that happen from time to time. The customers won’t need to search for a date. Instead, the month with the available date will be shown right away.
Once you’ve set it all, click on the “Save” button and your employee will appear on the “Employees” page.
Working with the Employees list and search page #
You can have one or as many employees as you need, and you can choose how to show them on the back-end of the plugin, and easily search or sort them. This is especially important for companies with a large number of employees.
On the “Employees” page you have several search options: by name, by service, by location, and two options to sort them by name: ascending and descending. These options will make your search easier in those situations where you have a large number of employees.


There are also two options to show employees on the page:
- Grid view, which is a default option, and
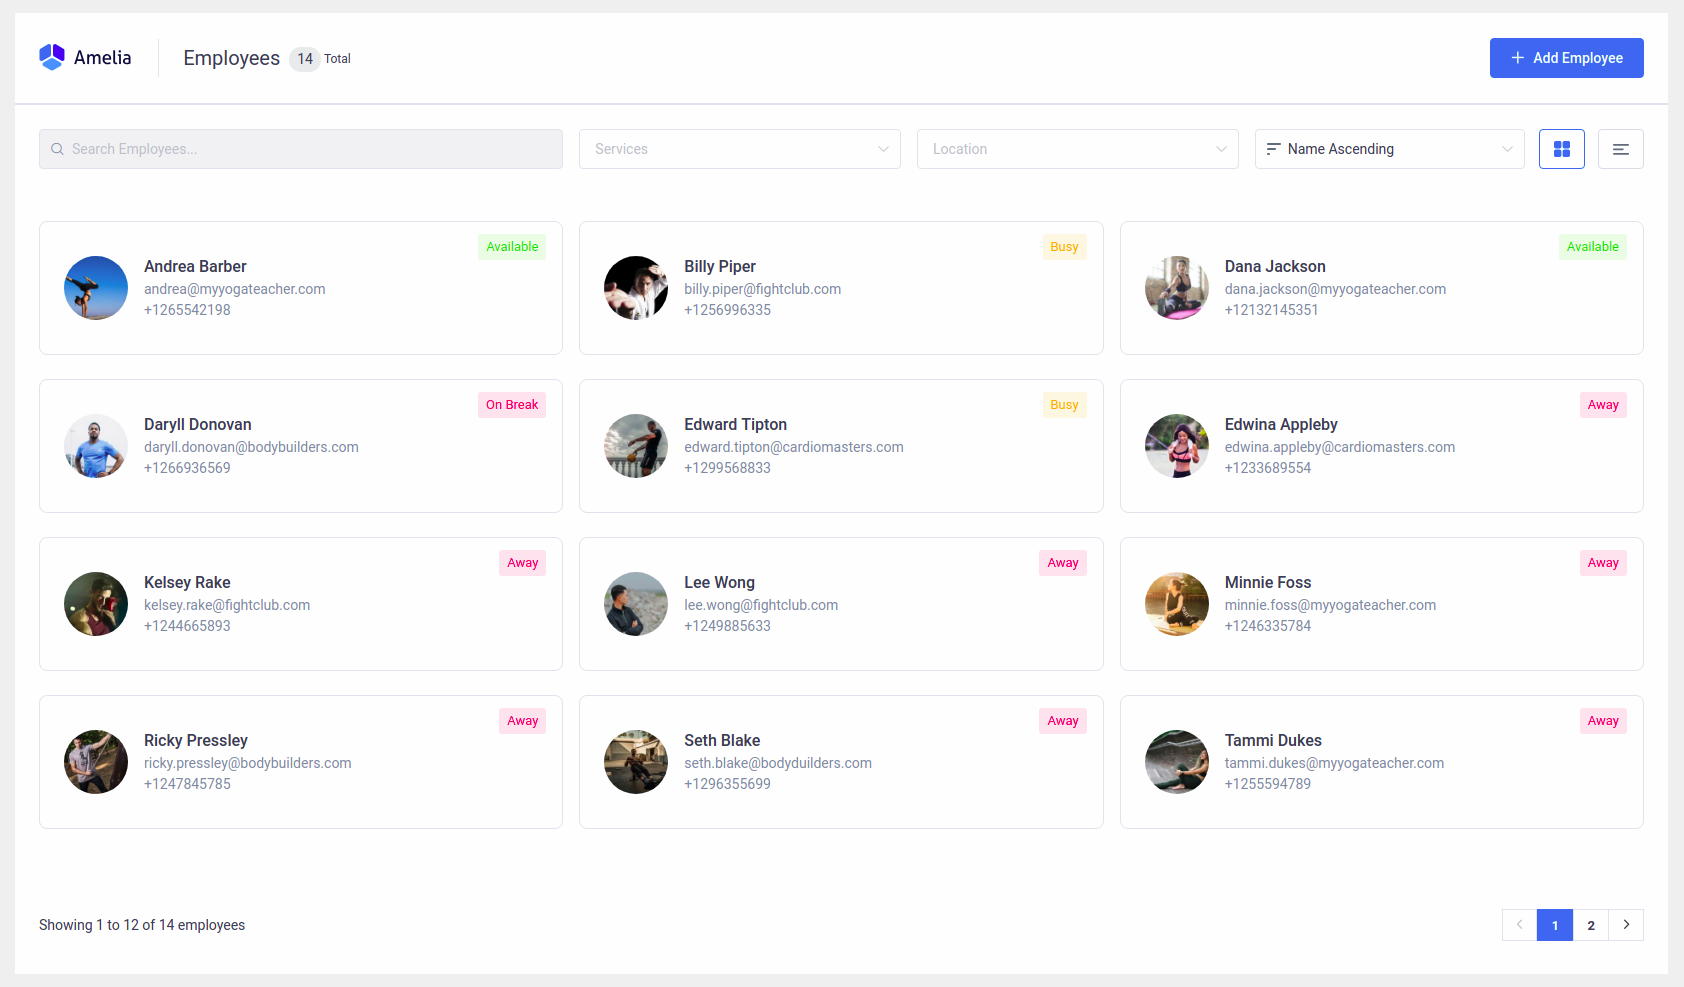

- List view

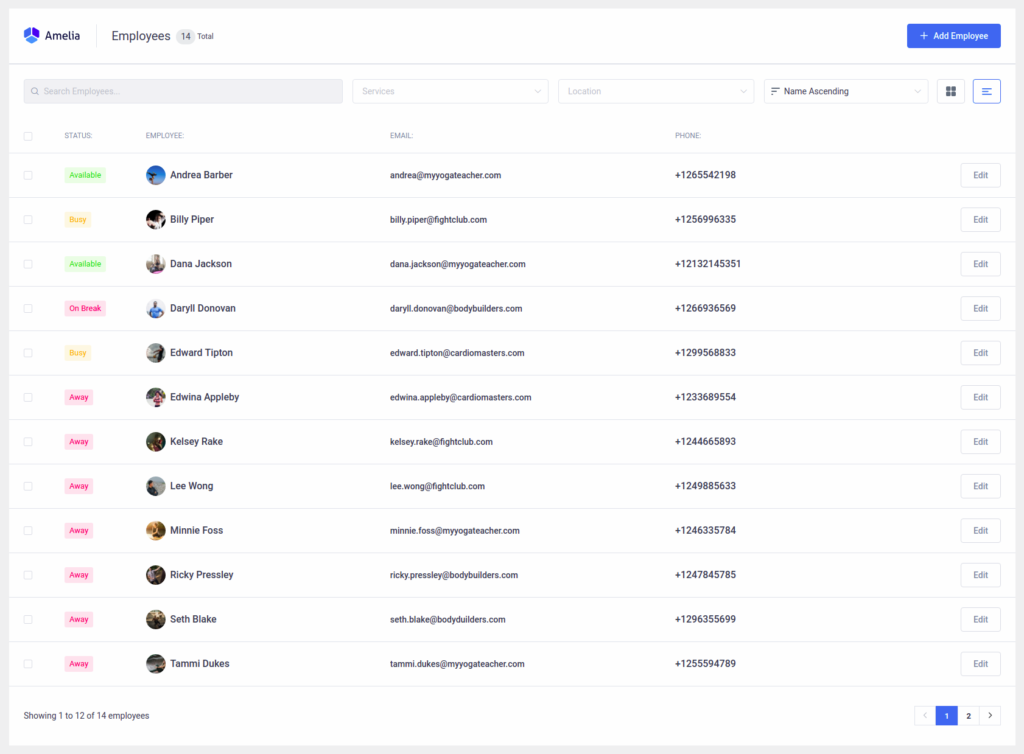
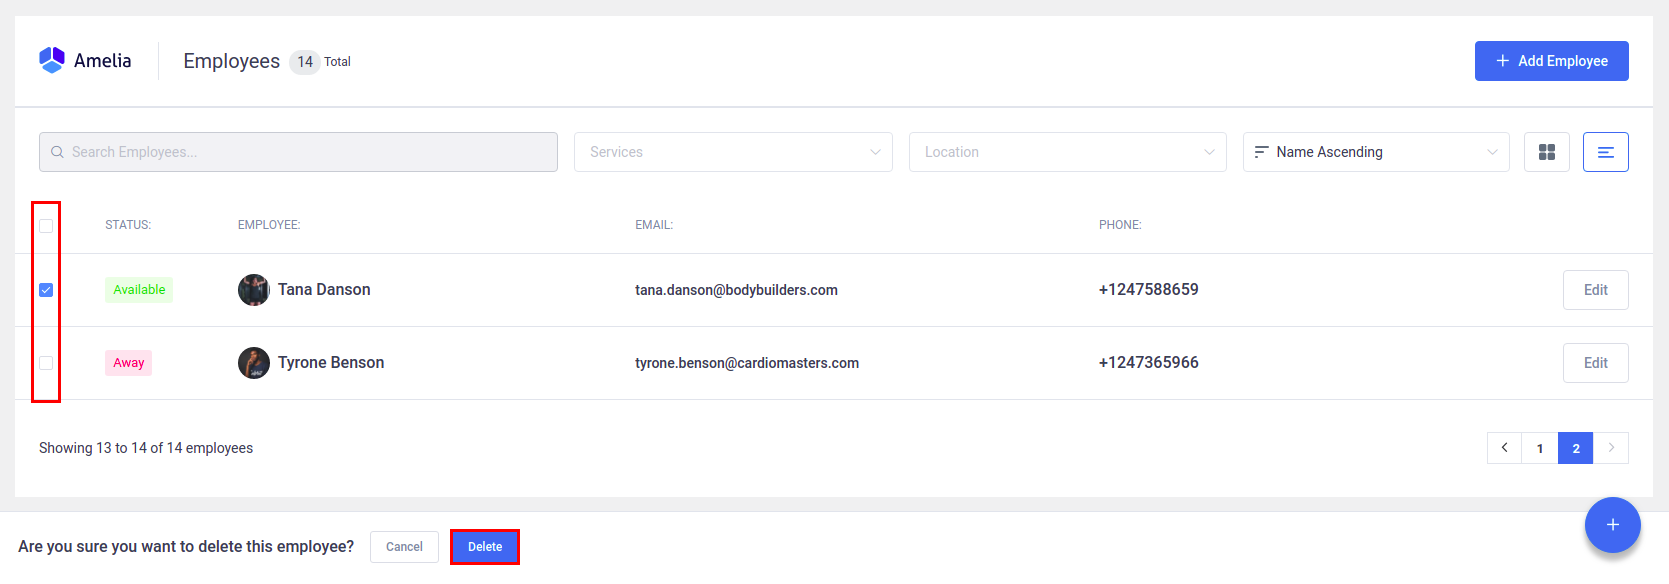
In both you will see an availability status for each employee, their name, email and phone number. In the list view you have an additional option – to mark and delete several employees at once.
Duplicate, Hide and Delete option # #
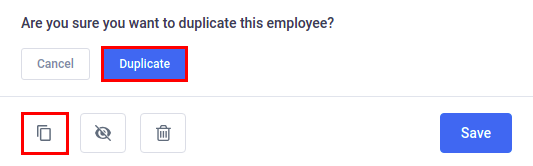
Click on the employee and the “Edit Employee” dialog will appear with three new buttons in the bottom left corner: “Duplicate”, “Hide” and “Delete”. While the “Duplicate” and “Hide” options are available for both, administrator and manager, the “Delete” option is only available for the administrator.
The “Duplicate” option is the first of three and helps you configure the settings. If you have several employees with the same location, assigned services, working hours and breaks, you can easily duplicate the first one you’ve created, and just change the name, email and a few other if you need. In that way, you can create a list of your employees much faster. After you click to duplicate the employee and confirm this action, the copied version will open. The only difference is that this copied version will not enter email, as you cannot have two or more employees or customers with the same email address.
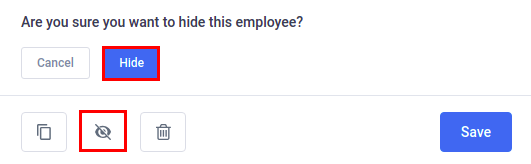
With the “Hide” option, you can temporarily hide an employee from the website front-end, without needed to permanently delete him/her. You will find this option right next to the “Duplicate” button in the “Edit Employee” dialog. When you hide an employee it will still be visible on the back-end of the plugin with a hidden sign, but it will not be visible on your front website.
While “Duplicate” and “Hide” options are available for managers and administrator, the “Delete” option is available only to the administrator. You can use a “Delete” option when you want to permanently delete an employee. You have two options to do so:
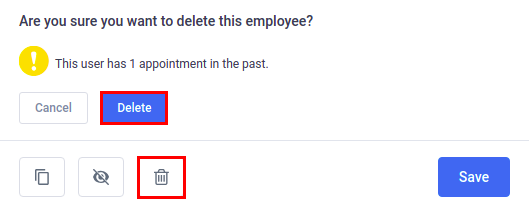
- By clicking on a “Trash” icon button in the bottom left corner of the “Edit Employee” dialog.
- By selecting it on the employee’s list and then clicking on a “Trash” icon in the bottom left corner of the Employees page.

Either way, you can delete employees without any appointments or with only appointments in the past, but you cannot delete employees that have appointments in the future. Once you click on a delete button you will see a message that will inform you of the number of appointments and the ability to delete.


